
28-03-2009, 11:35 AM
|
 |
Aِِbo(Nora&Islam&Judy)
Wael Magdy Salah
من انا؟: ابو نورا واسلام
التخصص العملى: IT Consultant
هواياتي: Computers, Automotives
|
|
تاريخ التسجيل: May 2008
الموقع: ام الدنيا مصر
المشاركات: 17,067
|
|
 رد: خطوة بخطوة كيف تركب الكبالن بنفسك
ده محتوى الشرح فى الرابط الاخير
irst of all, sorry if the grammar is bad, english is not my native language. This tutorial is not ment to sound patronising – this is written for those of you with less experience working on cars. A big thanks to Richard Black – a briskodian who helped me with this and most of this tutorial are his words.
It’s hard to say how much time this operation takes, for me it took a whole day, but most of the time went to wondering how to do this and photographing.
The tools I used:
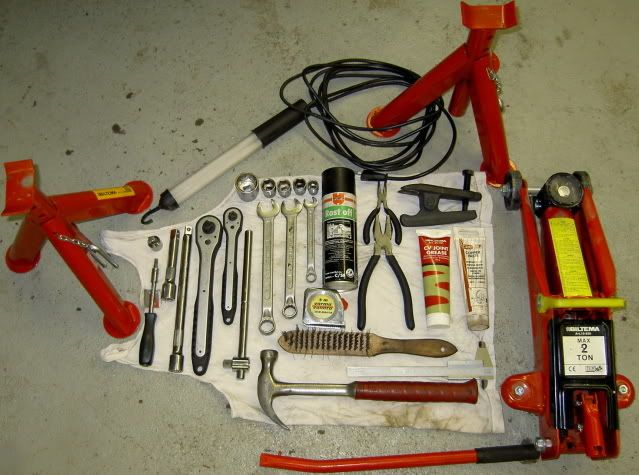 Including: Car jack and two stands, a work light, a chiselhead screwdriver, a couple of ratchet extensions and two ratchet wrenches, sockets (30, 19, 18, 17 and 14mm), fork wrenches (19,17 and12mm), a hammer, some measuring tools, a tie rod end separating tool, some lubrication and grease, a couple of pliers and a steelbrush.
If possible include another 19mm fork wrench and a torque wrench to your tools, I had to do this without them.
Off to work then!
If you’re only replacing tie rod end, jump to #2
1. Undo the drive shaft nut
Do this before jacking the car up and removing the wheel. Use the 30mm socket and loads of force! Mine was REALLY tight so I had to improvise a really long extension to get the nut loose. If you have access to pneumatic power tools, then use a boltgun to get this out.
Including: Car jack and two stands, a work light, a chiselhead screwdriver, a couple of ratchet extensions and two ratchet wrenches, sockets (30, 19, 18, 17 and 14mm), fork wrenches (19,17 and12mm), a hammer, some measuring tools, a tie rod end separating tool, some lubrication and grease, a couple of pliers and a steelbrush.
If possible include another 19mm fork wrench and a torque wrench to your tools, I had to do this without them.
Off to work then!
If you’re only replacing tie rod end, jump to #2
1. Undo the drive shaft nut
Do this before jacking the car up and removing the wheel. Use the 30mm socket and loads of force! Mine was REALLY tight so I had to improvise a really long extension to get the nut loose. If you have access to pneumatic power tools, then use a boltgun to get this out.
 2. Jack the car up and put stands in place
3. Remove the wheel
If you’re only replacing tie rod end, jump to #6
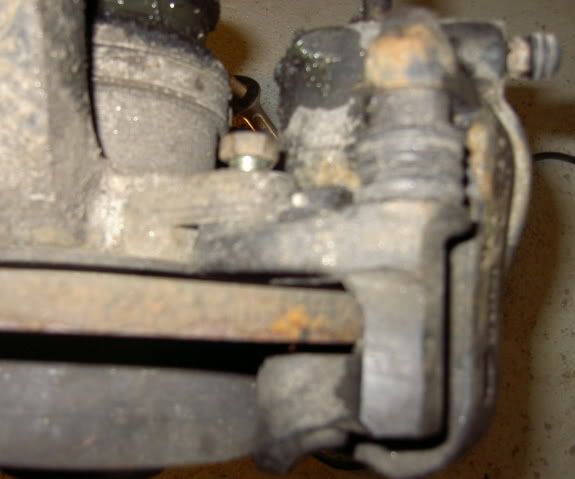
4. Take the brake caliber off
Remove the two bolts that hold the brake caliber to the hub using the 14mm socket. Place the brake caliber on top of a box or something so the brakehose won’t be damaged.
2. Jack the car up and put stands in place
3. Remove the wheel
If you’re only replacing tie rod end, jump to #6
4. Take the brake caliber off
Remove the two bolts that hold the brake caliber to the hub using the 14mm socket. Place the brake caliber on top of a box or something so the brakehose won’t be damaged.
 5. Take the brake disc off
Use the chiselhead screwdriver and undo the screw holding the brake disc to the hub. The disc might be rusted in place so tap the disc with a hammer to get it off the hub.
5. Take the brake disc off
Use the chiselhead screwdriver and undo the screw holding the brake disc to the hub. The disc might be rusted in place so tap the disc with a hammer to get it off the hub.
 6. Take the tie rod end apart
Remove the pin that’s holding the nut using pliers. Undo the nut using the 18mm socket.
6. Take the tie rod end apart
Remove the pin that’s holding the nut using pliers. Undo the nut using the 18mm socket.
 Take the tie rod end off using the tie rod end separator tool. If you don’t have the tool, you have to get it off using a hammer.

 If you’re only replacing tie rod end, jump to #12
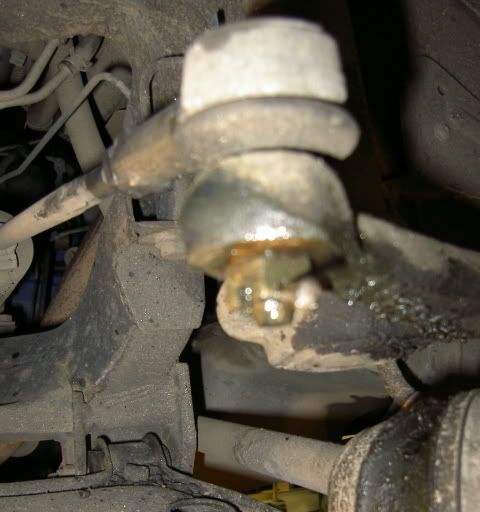
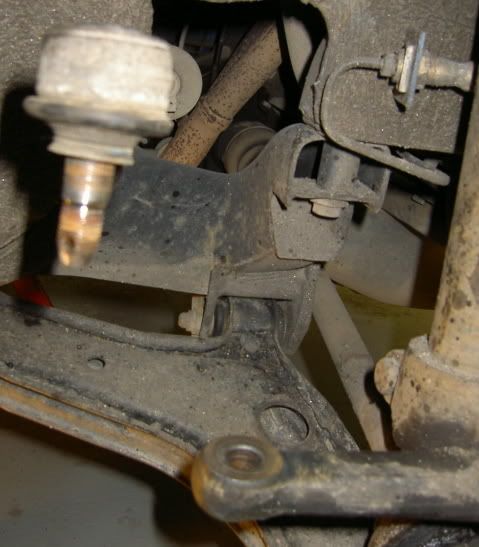
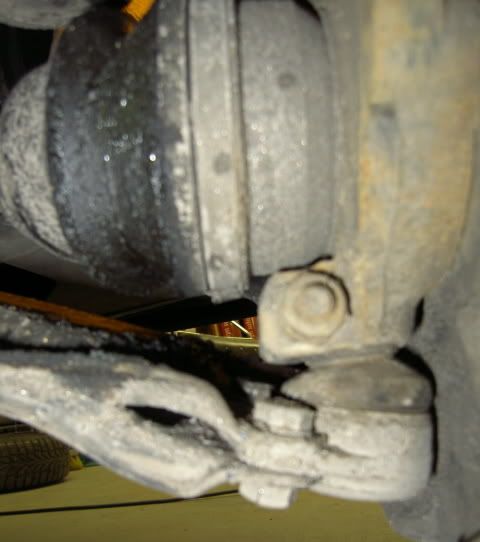
7. Take the bottom ball joint apart
Take the cross-bolt off using the 17mm socket and the 17mm fork wrench
If you’re only replacing tie rod end, jump to #12
7. Take the bottom ball joint apart
Take the cross-bolt off using the 17mm socket and the 17mm fork wrench
 Then you have to push the bottom member downwards until the ball joint shaft disengages. There might be many ways to do this, I attached a steelpipe to the member with string then just pushed it down with my foot. Don’t use a lever, it might contact the ball joint gaiter and tear it.
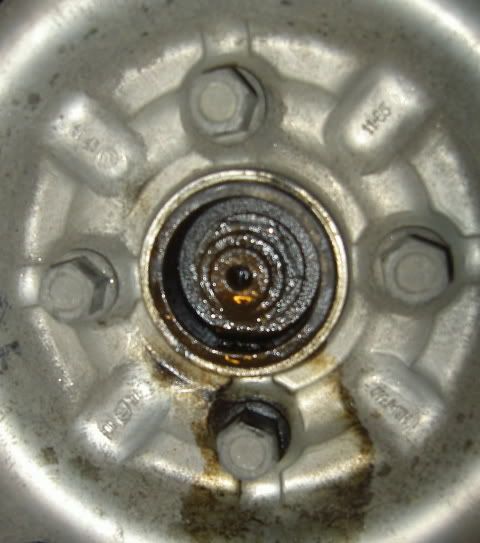
 8. Undo the CV joint
In my case it came off pretty easy, just a tap with a hammer to the end to loosen it and then pull it out. If it’s stuck then you’ll have to hammer it all the way out, an old ½” ratchet extension comes in handy here.
8. Undo the CV joint
In my case it came off pretty easy, just a tap with a hammer to the end to loosen it and then pull it out. If it’s stuck then you’ll have to hammer it all the way out, an old ½” ratchet extension comes in handy here.
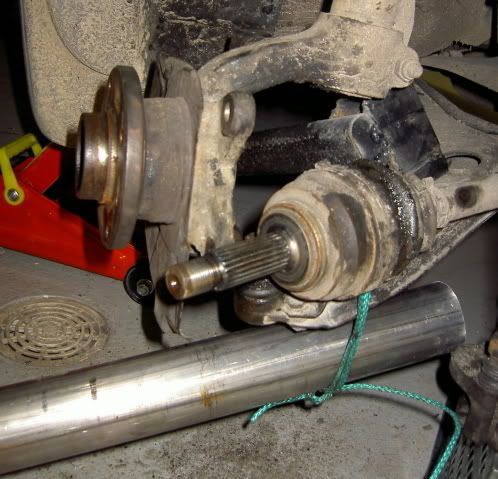 This next part is a bit tricky. If you wan’t to disengage the CV joint without taking it out of the gearbox, here’s how I did it: Place a vice (or the tie rod separator tool) to the drive shaft, then sit on the ground facing the hub. Push the vice towards the gearbox with your feet and pull the hub off the shaft with one hand. Tap the side of the joint with a hammer held in the other hand. It’s pretty tight and is held by a small circlip which will be done after you get the joint off the hub.
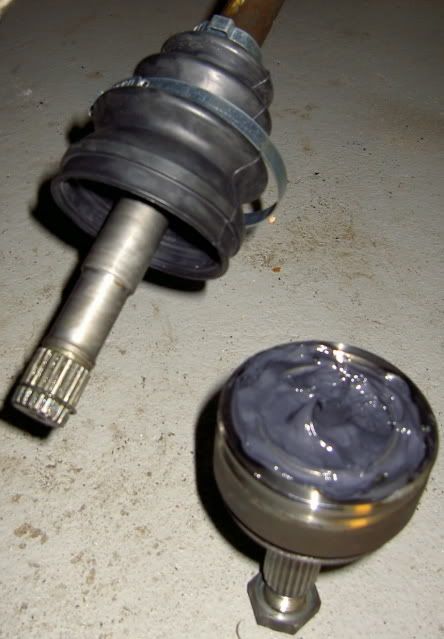
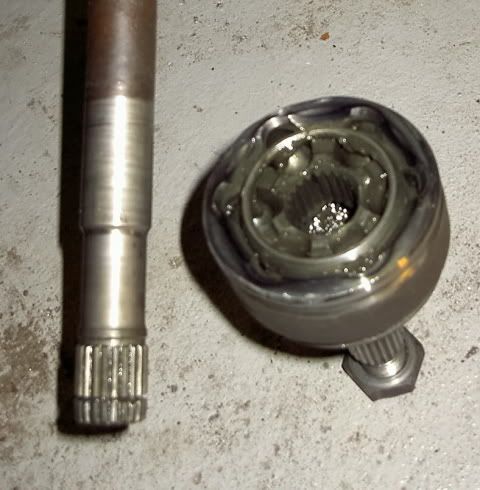 9. Replace the gaiter
Take the old gaiter off the shaft and put the new one with clips in loosely.
9. Replace the gaiter
Take the old gaiter off the shaft and put the new one with clips in loosely.
 Clean the shaft and the CV joint of the old grease and put in new.
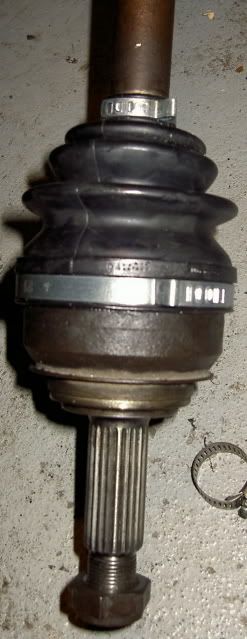
 10. Mount the hub back to the shaft
Fit the new circlip to the track on the shaft, then tap the hub back on the shaft. Fit the new gaiter to its place and tighten the clips using pliers.
10. Mount the hub back to the shaft
Fit the new circlip to the track on the shaft, then tap the hub back on the shaft. Fit the new gaiter to its place and tighten the clips using pliers.
 11. Put the CV joint back in place
This is the reverse operation of #8, #7, #5 and #4. Be sure to tighten everything properly!
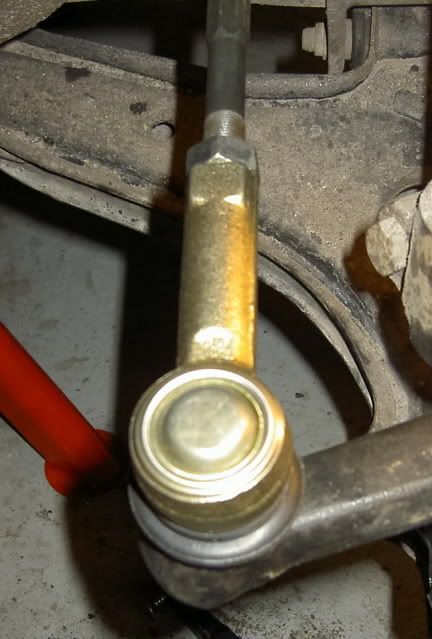
12. Replace the tie rod end
First you should check if the new tie rod end is similar to the old one, the idea is to get the center of the ball joint to the same distance from the tie rod as the old one.
11. Put the CV joint back in place
This is the reverse operation of #8, #7, #5 and #4. Be sure to tighten everything properly!
12. Replace the tie rod end
First you should check if the new tie rod end is similar to the old one, the idea is to get the center of the ball joint to the same distance from the tie rod as the old one.
 Take the nut that tightens the tie rod end loose using two 19mm fork wrenches and undo the old tie rod end. If the new tie rod end matches the old one just count the threads as you undo the old one and twist the new tie rod end exactly the same amount of rounds clockwise. Put the ball joint shaft back in place and tighten everything.
 12. Put the wheel back on, drop the car down, refit the wheel hub nut and torque it as recommended (about 200ft-lb).
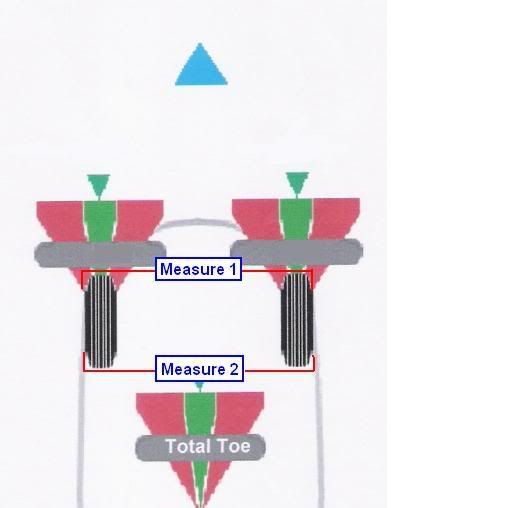
13. Adjusting toe
Usually the toe is best to be checked after replacing tie rod ends. I got pretty good results just by measuring the the distance of the front and back of the front wheels. Move the car a few meters back and forward holding the steering wheel straight to get the wheels to settle. Then measure the distance from front wheel to front wheel on the front (Measure1) and on the back (Measure2) of the wheel. Compare. The front should be a few millimetres less than the back. If it needs adjusting, simply move the tie rod ends inwards if you have too much toe-in and outwards if you have too much toe-out.
12. Put the wheel back on, drop the car down, refit the wheel hub nut and torque it as recommended (about 200ft-lb).
13. Adjusting toe
Usually the toe is best to be checked after replacing tie rod ends. I got pretty good results just by measuring the the distance of the front and back of the front wheels. Move the car a few meters back and forward holding the steering wheel straight to get the wheels to settle. Then measure the distance from front wheel to front wheel on the front (Measure1) and on the back (Measure2) of the wheel. Compare. The front should be a few millimetres less than the back. If it needs adjusting, simply move the tie rod ends inwards if you have too much toe-in and outwards if you have too much toe-out.
 Hope this helps someone!
Cheers, J-P from Finland
Hope this helps someone!
Cheers, J-P from Finland
__________________
 اخر موضوعاتى
قريباً تقرير وتجربة اداء دايهاتسو تريوس * تويوتا راش
|